Pages

Tuesday, November 12, 2013

DIY Burlap Picture Frame {For the Holidays}


I know Thanksgiving is still a couple of weeks away, but my mind is set on Christmas!  In the retail world, once Fall arrives, Christmas is immediately on the brain.  I have been crafting up a storm to get new holiday decor in my shop booth.  I can barely keep up with all the other stores...not to mention Hobby Lobby who puts their Christmas decor on display in August!  That's too early in my opinion!

Everyone is LOVING burlap right now!  I especially love using it for craft projects around the holidays!  But have you seen the white burlap?!?  Burlap now comes in a variety of colors, but I am swooning over the white and my head is spinning with ideas of where to use it! 

Personally, I have always struggled with where to display all the Christmas cards we get.  I hate junking up the refrigerator and they are so pretty these days I thought people should have a prettier place to display them.  So after a quick trip to Hobby Lobby for the white burlap and a chance find at Goodwill,  I created a Burlap Open Frame Picture/Card Display that can be used all year round.


This is the frame I found at Goodwill for only 4 bucks!  It was already empty without the glass and backing, even better, and built solid with wood.  Perfect size for 2 rows of card displaying.


I started by cutting about 10 strips of the white burlap.  I knew I would need some kind of adhesive to get the burlap started.  I initially thought hot glue, but hot glue + burlap = blistered fingers.  So I pulled out my all purpose HEAVY DUTY 3M double stick tape.  This is commercial strength and I use it for everything!  My fingers were sticking to the frame this stuff is so strong.  It works just like double sided tape -- roll out a strip and peel off the back! 


And just start wrapping the frame with the burlap!


Almost complete and I ran out of burlap! 

No worries!  Just needed to cut one last strip of burlap!

And a Word to the Wise while working with burlap, especially white burlap, DON'T WEAR BLACK!  This is what happens.  I must warn you so you don't make the same mistake! :-) 


Finished product!


I used natural jute string to add to the rustic feel of the frame, tied to the back of the frame by picture hanging hooks.  I tied a sweet little plaid bow on mine to make it a little more festive for the holidays, but without the bow, this frame can be used year round for pictures, notes, or cards. 

Some other Christmas decor I am working on to sell in my shop!

Chalkboard Art Knock-Off
An open frame to easily change out your favorite holiday photos!
An open frame with burlap for displaying cards or photos.
A simple frame embellished with vintage Scrabble pieces.
Hand drawn details.
Scrabble art for the kid in you!

Don't worry this isn't the end to my holiday decorating and crafting....there will be lots more where that came from! What kind of crafts are you working on for the holidays?


Thursday, October 31, 2013

Dictionary Page Vase Filler

Threshold Brass Hurricane
 I found these perfectly simple yet beautiful little brass hurricanes at Target for a client's home office I am working on.  My initial thought was to just put a candle in each of them, put them on the bookshelves and call it a day!  Boring!  I'm tired of just sticking a candle or those decorative garden balls in a vase or hurricane.  I wanted to do something a little more interesting. 


So, since it is an office I thought I would do something easy and a little more interesting with dictionary pages.  Now when I say easy, I mean super easy.  However, I still included a little step-by-step tutorial for those of you who like those.

I picked up my Dictionary from Goodwill a couple of years ago and use the pages for lots of different craft projects.  


For this project I tore out about 12 pages in the dictionary to make 6 bundles.


Now just roll them up!  I doubled the pages as I rolled them so they were a bit heavier.  The single page by itself had a tendency to just crunch with I started to tie it.


I used a short piece of jute string that I already had to tie each one.  This is where you can get festive for the holidays and change up your ribbon depending on Halloween or Christmas.


And, honestly, that's it!  It is just that quick and simple.  Continue that for each one and place them in the hurricane and you are finished!  You can do more than six for a larger vase or fewer for something smaller.


I love these!  I think they could be used with holiday decor, colored paper, and fit a lot of different sized decorative vases.  Just a quick little tip for a rainy day if you are trying to freshen up your home accessories!

Another fun idea for dictionary pages...


Inexpensive and easy artwork!  This is also going into the client's home office.  He has a thing for Abraham Lincoln, so their will be a lot of fun projects for the space including honest Abe!  All I did to create this is...

1.  Find an image on Google that I want to use 
(black and white look the best as well as a hand-drawn looking image)
2.  Copy and Paste into Powerpoint
3.  Load my printer with just one dictionary page sheet
4.  and Print! 


{sorry about the grainy photos - just a quick post with my iPhone today}


Tuesday, October 22, 2013

Happy Fall Y'all

Fall has officially arrived (I am a couple of weeks behind), but it definitely feels like Fall now with this cold weather!  Especially after just getting back from vacation where it was in the 80's all week. 

When it comes to Fall decorating, I typically don't overdue it too much.  I feel like it comes and goes so quickly, and before I know it, I am decorating for Christmas!  So, I just focus on 2 main areas -- the front porch and my entry way.  I am sure to always buy and decorate pumpkins for the front porch.  I usually don't carve the pumpkins, it is such a mess!  So each year I like to think of a new way to decorate the pumpkins without the carving.  And I love to give my entry way a festive new look for the season to greet guests.

Here are the pumpkins just plain -- trying to decide how to paint them still.

The Fall wreath on my door stays simple.  Just a craft store wreath ring wrapped in burlap with a black and white bow.  Perfect for both Fall and Halloween.

Craft Day has Arrived!  (or pumpkin makeover day!)
I like to get together with friends or family throughout the year to do seasonal crafts.  This Fall we decided to bring our pumpkins together and we would decorate and paint them together!

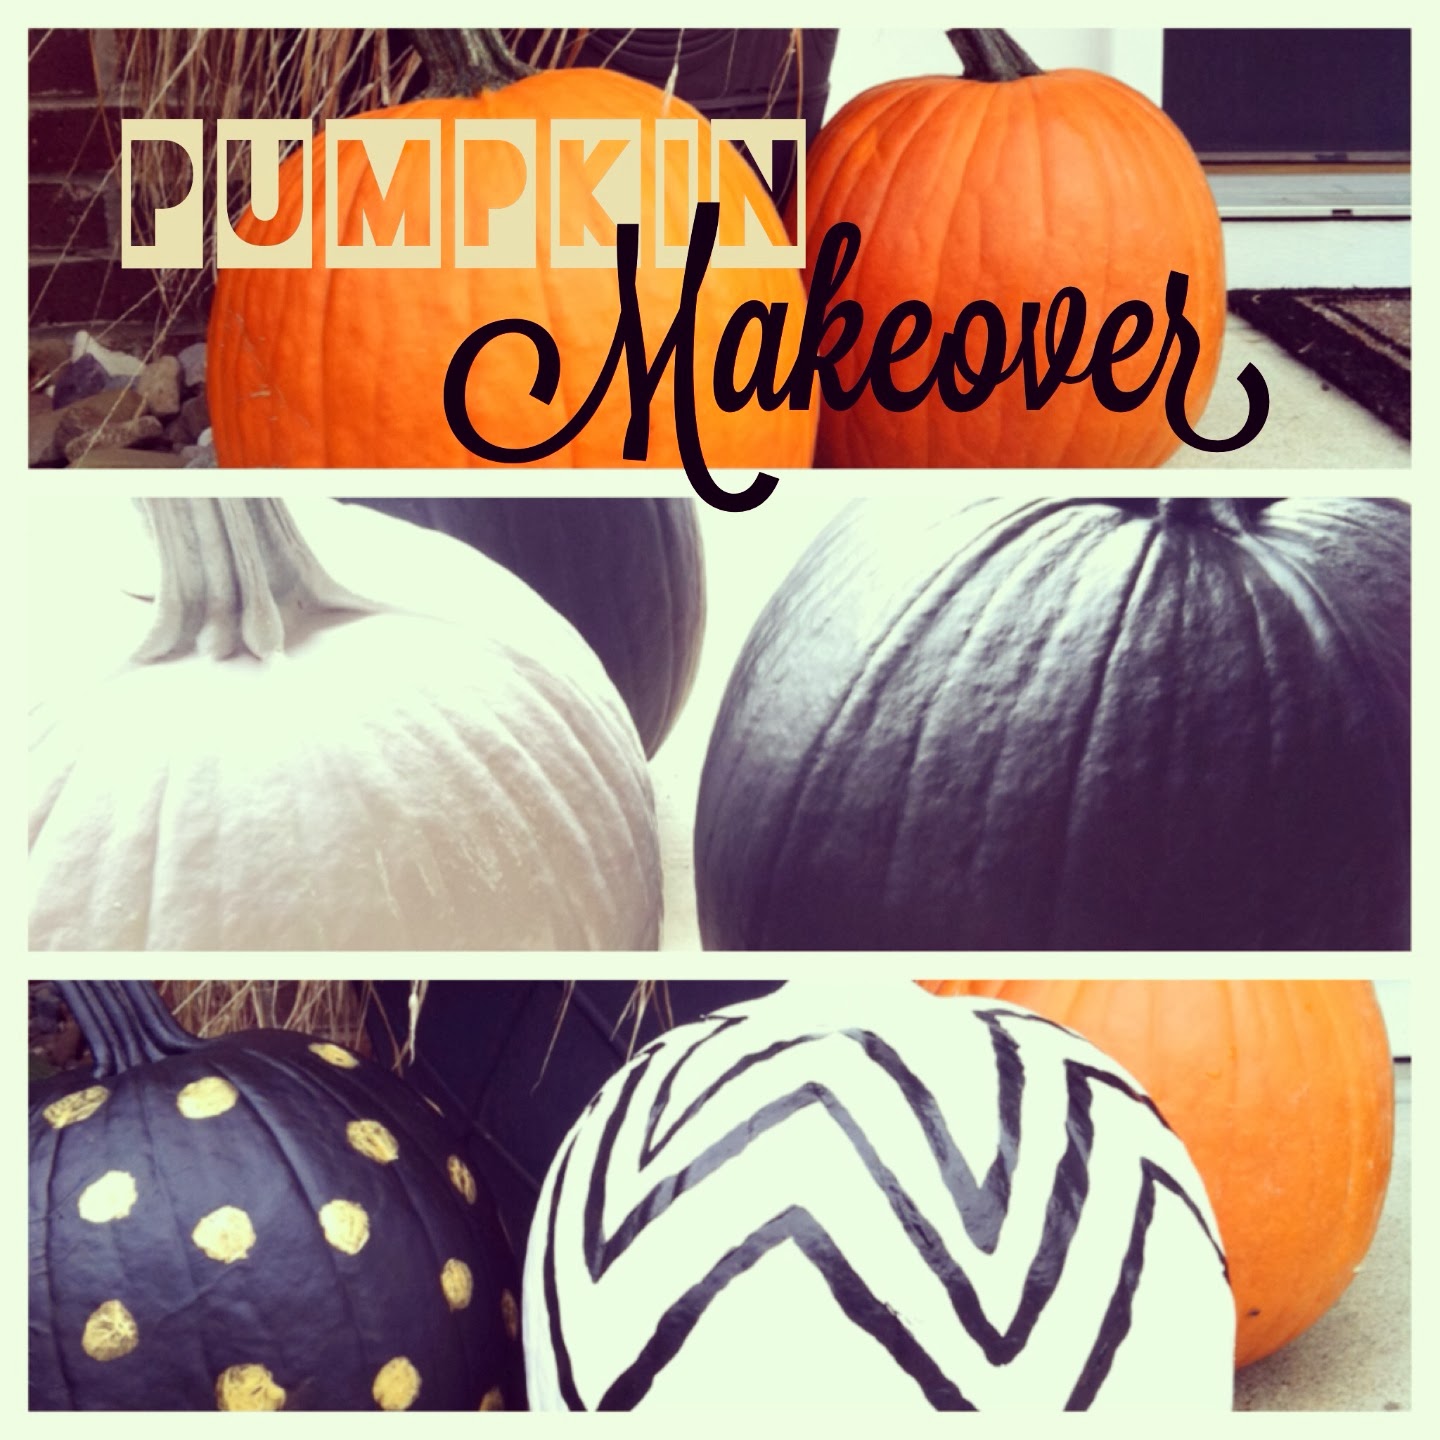
I decided to go with a Black & White theme for my pumpkin decorating this year!  So a couple of days before, I spray painted 2 pumpkins black and 2 pumpkins white.  I just used regular spray paint I had lying around the house.  This way, they were nice and dry and ready to be decorated on Craft Day.  

Here's how they turned out!! Each one was a little different.  So now my porch is festive and fun for Fall and Halloween! 

There ended up being 1. Monogram  2. Black & White Chevron  3. Gold Metallic Polka Dots  4.  Plain White

Welcome! Come on in!

This is what my entry way normally looks like.  Some vintage suitcases, an "M" on a stack of books, a faux plant from Ikea, some iron rings from Crate & Barrel, and my favorite cow picture taken by my photographer at my rehearsal dinner before my wedding. 

And this is what it looks like decorated for Fall.  Most of this is I already had.  Either tucked away in Fall Decor storage or around the house.  By just rearranging things within your home periodically, it will feel fresh and new without going out and buying new all the time.  

What I did here -- I added the owl.  Spray painted an old frame orange and added a free printable from Pinterest that looks like chalk art.  This way I can add a new piece of art for Thanksgiving without changing the entire table.  I spray painted an empty old frame I had lying around yellow for a pop of fall color.  I added a vase of 3 decorative green balls and a large ball of twigs for some natural textures.  Some white pumpkins from the Farmer's Market in a large vintage jar were added.  And a book was replaced with one with a pop of color.  So you can make a big difference in your entry way with just a few things that you probably already have around your home.

While I was at it, I decided to make some Fall banners.  I couldn't decide if I wanted a Halloween banner or just a Fall banner that could be left out longer throughout season, so I made one of each.  Following Shanty 2 Chic's blog tutorial, along with my own printed chalk board letters and take on the tutorial, I now have 2 great banners to hang around the house! 
Making the Fall banner out of burlap and printed letters from my computer.  (created on power point)


In the midst of making our homes beautiful, one DIY project at at time, it is the journey of how we get there that is most memorable.  Even if it takes a little longer than you planned!
Ooooops!!!  CRAFT DAY FAIL!
My sister may have been a little distracted when she made her Fall banner backwards!  Don't worry, it was fixed before hung on her mantel! 

Enjoy your FALL and everything that comes with it because before we know it, WINTER will soon be arriving! :(  Brrrr!! 


Related Posts Plugin for WordPress, Blogger...