Pages

Showing posts with label bookshelves. Show all posts

Friday, September 5, 2014

How-To Decorate with Turquoise


You may think of decorating with turquoise only in the summer months, but it is a great accent color for fall too.  Most people think of only using it in the summer because the bright, cheery color reminds us of the ocean and the beach.  But darker shades of turquoise and teal are perfect accent colors in the fall paired with neutrals like gray, brown, or black.  You will see this color every where right now from West Elm and Target in their new fall home decor.  It is even a hot color trend in accent furniture with refinished antique pieces.


This neutral chair gets a punch of color with a turquoise and cream rug underfoot, a turquoise pillow with a gray and white patterned pillow, and turquoise accents on the rattan side table.


With this client, we started with a very neutral space -- dark hardwood floors, grayish/brown leather sofa, light tan accent chair, and gray walls.  My plan was to bring in lots of color and vibrancy to the room with the accents.  So we picked one color - turquoise - and all of the accents in the room are now in shades of turquoise!


Did you notice that amazing chandelier!!  The homeowners chose this during their home renovation to add some industrial style to the space!  It is really gorgeous!!!

Even though it felt like I was purchasing a lot of turquoise items, once they are all together in the space, the turquoise is not overwhelming at all!


When it comes to choosing objects and accessories for a room or bookcase in just one color, don't be afraid to mix different shades of that color.  For example, we chose turquoise for this space.  But I selected items in all shades of turquoise.  Turquoise can be a tricky color because it can lean towards green or more bright blue.  Instead of picking one or the other, I chose to do a mix of shades.  This gives the space more interest and a more sophisticated, collected look.  I also added in white and silver pieces to break up all the turquoise and add some dimension in the bookshelves.


I've said it time and time again, one of the easiest and least expensive things to add to a bookcase for color are BOOKS!  Who would have thought.  But some people completely forget to add books when styling bookshelves!  Go straight to Goodwill, look under the paper sleeves of the books, and pick your book based on the colors! Now throw the sleeves of the books away and display the beautiful books naked.   I chose books in shades of blue, turquoise, and teal for these shelves.


I shop everywhere when gathering items for bookshelves.  It gives it a more collected look than everything being so matchy-matchy!

Picture Frames -- Home Goods
Bird - West Elm
Clock - World Market Cost Plus
Cloche - Home Goods
Blue Paper Wight - Home Goods
Turquoise Vase - Home Goods
Dark Teal Vase - West Elm
Clear Lantern with Candle - World Market Cost Plus
Books - Goodwill


A good tip when decorating bookshelves like this -- buy more than you will use!  It really helps to have options when styling a space like this.  You may think something will work when you see it in the store, but once you get it home, you may not like it!  So, buy about 5-7 extra pieces to have on hand!


Dark Teal Vase - West Elm
White Vase - West Elm
Picture Frames - Home Goods
Turquoise Vase - Home Goods
Head Statue - Home Goods
Clear Lantern with Candle - World Market Cost Plus
Silver Sphere - Home Goods


 Between the rug, the barstools, the big comfy chair with turquoise accents, and all the turquoise in the bookshelves, I think this space has just the right amount of turquoise to make it bright and colorful with just the right amount of neutrals for the rustic, industrial style!  Do you have any turquoise in your home?  How have you used this color?


Thursday, June 12, 2014

How to Decorate and Style Bookshelves


With a recent remodel to her fireplace, this client was ready for an update not only on the outside of her fireplace, but inside the bookshelves.  She was driving herself crazy trying to decorate the shelves, and eventually getting frustrated when she wasn't satisfied with the outcome.  Like a lot of us, she spent a lot of time buying items for the shelves, and then eventually returning the items because they just weren't right.  It is so hard to decorate a space like this when you don't really know what to do with it or what to buy.  So she called me up to decorate them for her.  Now she can stop worrying about this area of her home and just sit back and enjoy the completed space! 


She had a great start on the bookshelves, and had some amazing pieces to work with.  She knew exactly the style and look she was after, just didn't know how to get it there.  I came in and added in a few more pieces to really fill the shelves and give both sides of the fireplace a more cohesive look.  I put together a plan of action for her and together we sourced out the materials.  Once we gathered all of the accessories, I came in and styled the bookcases for her.


When you are working with bookcases on either side of a fireplace like this, it is really important to keep the look cohesive from the left to the right side.  By adding in the same or similar items on both sides, there is now pattern and flow from left to right.  This allows the eye to see a more calming space, rather than not knowing what to focus on first with a hodge podge of different items of all random heights and placements.  You will see below the items that are the same from left to right.  I added height to the items by including a stack of books.  And kept a fairly pleasing neutral color palette on both sides with white, cream, green and just a touch of red.  All of these tricks leads to a sophisticated, styled bookcase. 


As you can see, no decorating dilemma is too small for me.  Contact me today for any small area that you are having trouble with and would like some help on today! 


Wednesday, December 18, 2013

{Holiday Decorating} Day 11: A Client's Christmas Home Tour

Decorating a Client's Home for the Holidays


Decorating a stranger’s home for Christmas was actually quite the challenge!  Once they contacted me about my services, I only had a couple of weeks to get to know this family and figure out how they used their home for the holidays, so I knew how to decorate it!   

Christmas decorating has to be very personalized, more than your average, everyday decorating.   There may be traditions that need to be upheld, religious, non-religious, children that like to be involved,  special ornaments that need to be hung?  There is a lot to think about and a lot to consider.  It is a very delicate thing to do for someone I think.  And I took all of this into consideration when decorating this client's home for the holidays.


Luckily the clients were amazing to work with and such at ease with the entire thing.  They trusted my design and overall ideas for the space.  She basically let me go and do my thing!  This client loves anything Pottery Barn, so we found our inspiration through Pottery Barn holiday magazines to give the space a casual, rustic feel with a traditional color scheme of red and green.


Christmas symbolizes family, tradition, and being together, and that is exactly the kind of space I wanted to create for the family of four!


An Inviting Holiday Entryway


All of the framed artwork was found on Pinterest and just printed on my home computer. 


Instead of garland all along this huge staircase that winds up to the second floor and open to the first floor, we opted for two simple Christmas swags on the posts.


A Classic Family Room


Sometimes you just have to work with what you have!  An easy way to bring in color and fun holiday patterns into a space are through pillows.  These are $7 pillow covers from Hobby Lobby that can simply be slipped over existing pillows during the holidays.


Their new 9 foot tree was a daunting task for them!  They've never decorated a tree this large, so they didn't know what to do with it.  I bought all new ornaments, ribbon, and tree trimmings, brought out the ladder and filled the tree with shine and sparkle!


I stayed with mainly red ornaments, with a couple of gold and greens ones stuck in for contrast.


Burlap was used for the ribbon to stay with the overall rustic and natural theme for the decor. 


The mantel was the most important element to me in this design because it is the focal point of the home.  I wanted to make a big impact with simple objects.


Before + After


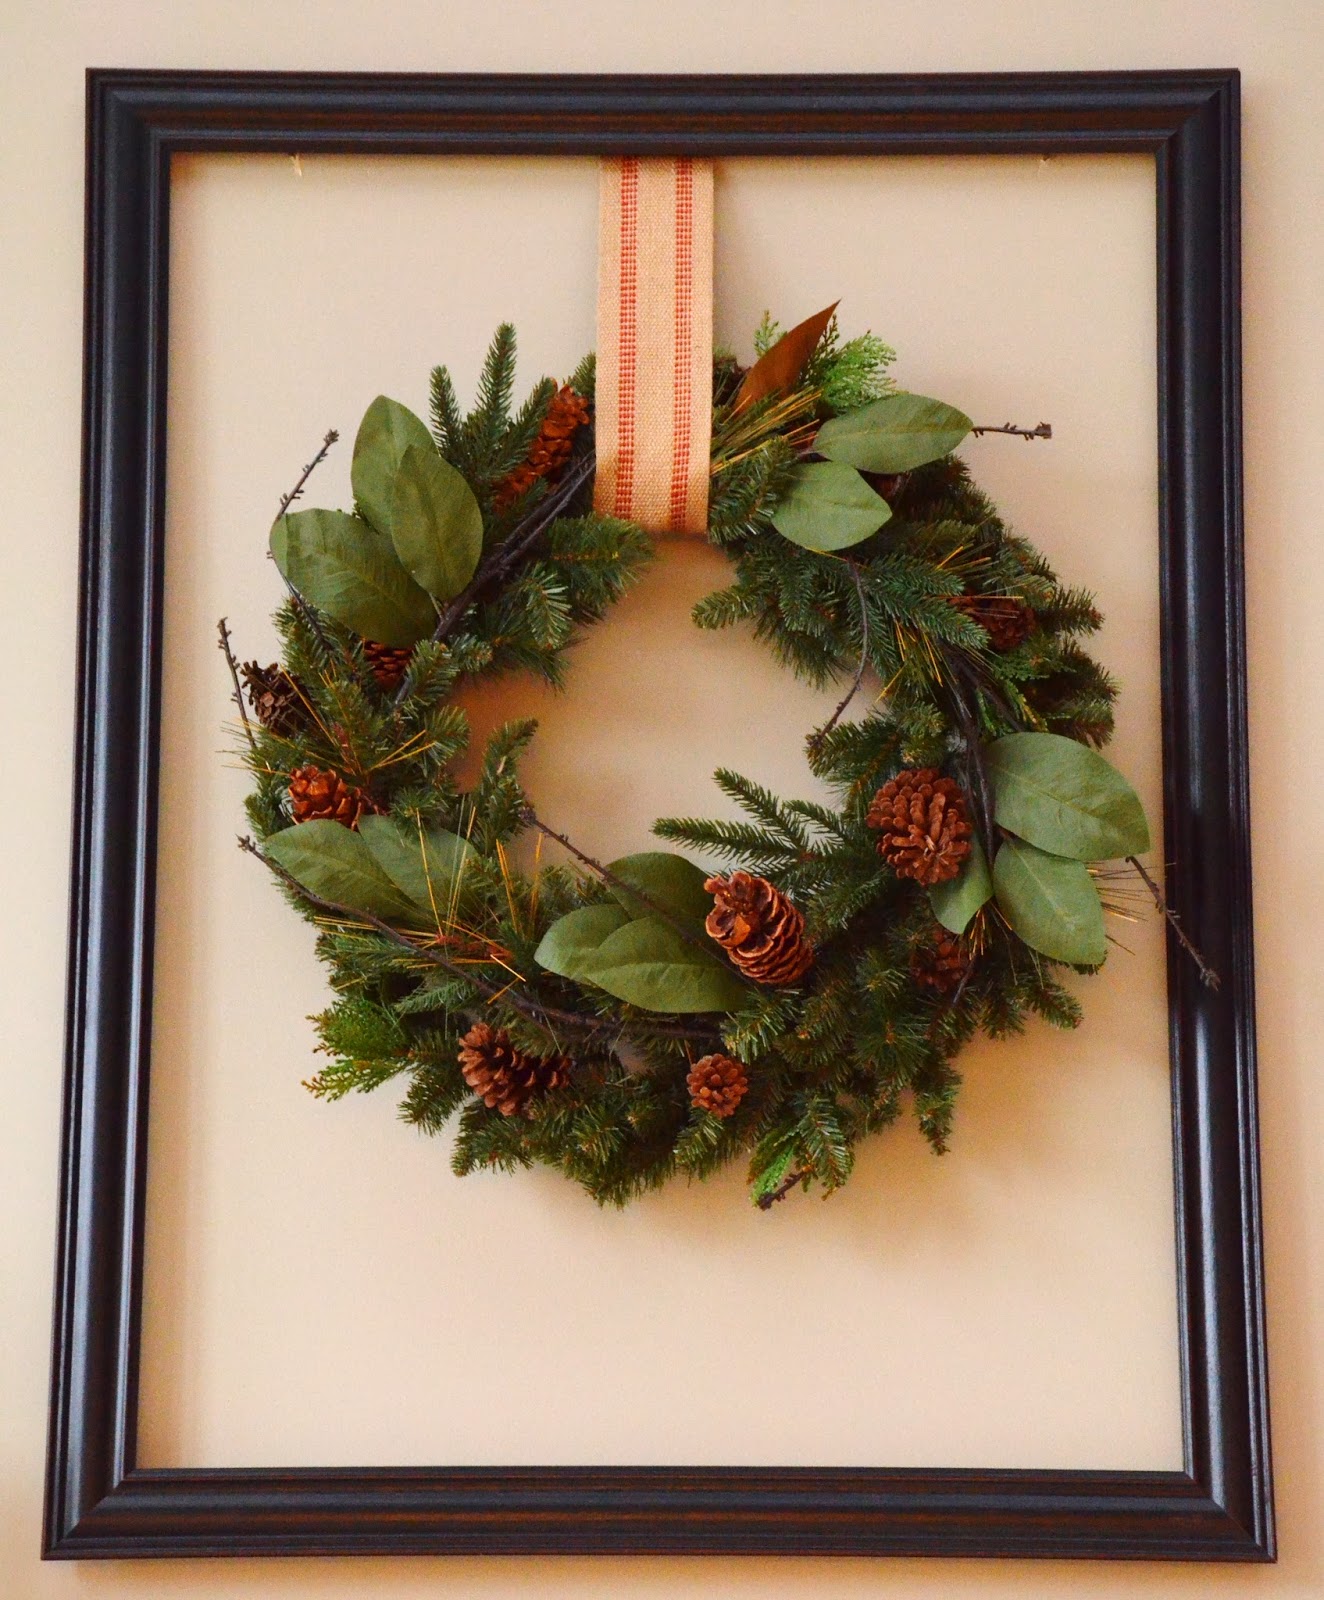
I love just a simple wreath above a mantel at the holidays, but just a wreath by itself was not going to be enough for the size of this mantel and fireplace area.  So, their large artwork was removed (for now) and I replaced it with a large 3 feet by 4 feet open picture frame (which can be bought like this) and hung the wreath inside the frame for a grander statement.


A gold gilt finish on the NOEL stocking holders brightens up this mantel.  A row of classic velvet stockings, each stitched with a name are not only beautiful, but a keepsake the kids look forward to year after year.


I even fixed up their bookshelves, even though it wasn't on "the list" of things to do.  I think people get so frustrated with what to do and how to style bookshelves, but it really doesn't have to be that difficult.  I used all of their same objects that were already in their bookshelves, just added a few Christmas pieces and took away some items.   

Helpful Tips When Styling Bookshelves:
1.  Pull everything to the front
Even though these bookshelves are deep, you can't see anything in the back, so bring everything to the front and put it in a straight line.
2.  Separate the books for groupings
Here I used all of their same books but separated them into groupings of 3 or 5 and put them vertically or horizontally to use them as more of a display area.
3.  The power of 3!
I use this ALL the time!  When in doubt, group three "items" together and leave it at that. For example, a group of 3 books, 1 statue, 1 picture frame, and that's it! 

Think of a bookshelf as displaying items and not just throwing items in the bookshelves.


Eat, Drink, & Be Merry: The Eat-In Kitchen


A lantern like this one from Pottery Barn makes the perfect centerpiece for a table.  It has height, you can fill it with anything from a candle to Christmas ornaments.  And you can reuse it after the holidays!  I decorated this lantern with matching upholstery jute webbing, same as the wreath above the mantel, and Magnolia leaves with pine cones and berries.


Even small items can speak volumes.  Get creative with ordinary Christmas decor such as these ornaments and use them in a way that is anything but "ordinary."


With only cookbooks as her decor before, I brought in new glass vases filled with matching Christmas ornaments from the tree, fresh cranberries, and pine cones.  


This cheerful room captures the spirit of the holiday season.  A row of personalized stockings draws the eye to the hearth with its flickering lights and festive greenery.  A simple lantern adorned with ribbon and greenery offers enough contrast to the copper tabletop.  A mix of burlap and jute with Magnolia, pine, and boxwood leaves throughout the home offers a rustic look while the red and gold shimmer lends the perfect touch of Christmas sparkle! 


Only 7 more days until Christmas!

*Contact me if you are ever interested in holiday decorating for your home!*


Related Posts Plugin for WordPress, Blogger...