

I am seeing Fall decor everywhere!!! Officially it is not Fall yet, but after Labor Day, I think we all have the mindset of saying 'goodbye' to Summer and 'hello' to Fall! It is a bittersweet time for me....I love Summer and hate to see it end, but I also love Fall....pumpkins...burlap...pumpkin spice latte...pumpkin spice everything...football games...apple cider...mums...leaves changing color...boots...leggings and baggy tops...scarves!!!!
So I decided to embrace Fall (which is almost here) and do my first Fall Decor DIY project of the season to add a touch of Fall to my home!

I ran across a pile of old windows a while back and couldn't pass them up! I didn't have specific plans for them, but I knew an idea would pop in my head eventually. I had half a can of chalkboard paint left from another project so I decided to paint the glass of the windows to create a large chalkboard sign!
I love decorating my home with signage during Fall and Winter Seasons. There are so many holidays within these months that a chalkboard sign is perfect to just erase and add a new quote or drawing for the holiday approaching -- Halloween, Thanksgiving, Christmas, New Year's Eve.
Here are some of my favorite chalkboard art ideas from my Pinterest Board 'holidays.'

This project is so easy! All I did was clean the window frames and glass up a bit to start. The hardest part of this was figuring out how I wanted to paint the glass -- roll on the paint or hand brush it on?!?
I decided to tape off the window frame so I didn't get any paint on the wood frame. I purposely put about 1/4 of the tape edge on the glass so that some of the glass would not get painted with the chalk. Once the tape is peeled back there will be just enough of the glass showing through to be able to see it once was a window.
.JPG)
The first window I painted, I used a large foam brush. It took about 5 coats of paint and a lot of waiting on paint to dry in between. If you have never used chalk paint before, it is a little thicker than normal wall paint and dries pretty quick (or at least it did when I was doing these outside) so you have to be quick. You also have to do lots of thin coats of paint. If you try to paint an area with a 2nd coat before it is dry, you run the chance of the first coat peeling off.
.JPG)
The next window glass I painted, I rolled the paint on with a regular roller brush like you would use painting a wall. Initially, I didn't use this because I knew the roller brush would just soak up a lot of the chalk paint. But it was SO much easier to roll the paint on the glass than to try to hand brush it on!

.JPG)
I would suggest buying a little roller brush instead of this large one I used. I had these leftover from another pant project so that is what I used instead of running out and purchasing new ones. But you can purchase smaller roller brushes that are only about 5-6" long and maybe 1" thick that I think would be perfect for this. That way you aren't wasting a lot of the paint that is just getting soaked into the foam roller.

I was able to paint two at a time fairly quickly. And because the paint was going on much smoother with rolling it on, it dried a lot faster. I still did 3 coats for each window so there wasn't any glass or light peeking through!

Use a paint tray to roll the paint onto your brush. Or get really smart like I finally did and just pour the paint right on the area you are painting.
.JPG)
After all 3 coats of chalk paint were dry, I used an x acto knife to score the painted area so the tape peeled off without peeling off the paint. You can see a little of the glass peeking through here too!
.JPG)
This is the old window finished! I have been wanting a chalkboard in my home for some time now. I know I will use this through all the seasons, the holidays, birthdays, and celebrations!

When it comes to drawing on the chalkboard, I use regular chalk. I have found that the chalk markers are a little harder to erase and will faintly be visible on the chalkboard even after you erase. I find it easier to find a sign on Pinterest for inspiration. I will look at the image and "try" to re-draw it.

This is the sign I looked at for inspiration. From Nest of Posies' free printables.
I just went for it and started free-handing. I knew that if I didn't like it, I could erase and start over!
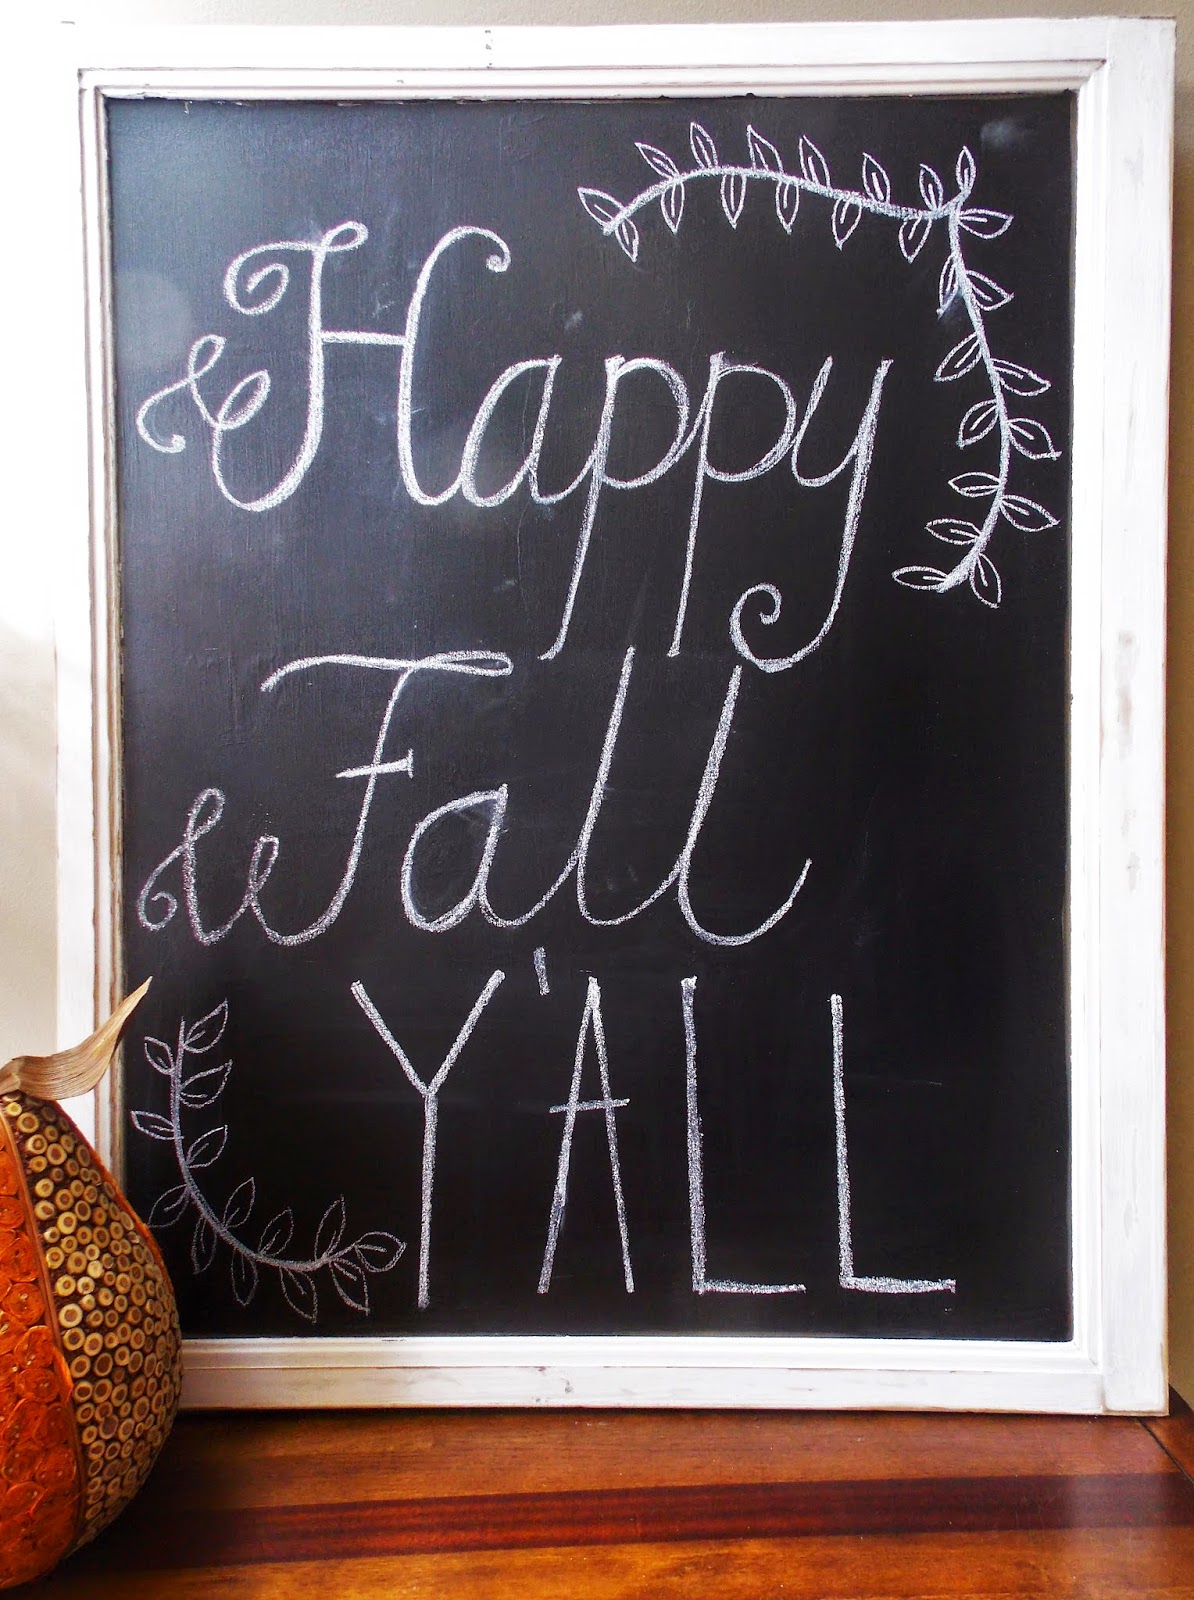

I'll probably add some little pumpkins or something to the table eventually like I did last year, but this is just the right amount of Fall in my home for now!!

The FALL banner is from last year. You can see how I made that here. The gourd decoration is from Home Goods a couple of years ago. I added artificial orange and red flowers to the pink flowers that were already in that vase all summer. Eventually I will remove the pink flowers once summer is officially over! The orange frame was made last year with a pumpkin printed onto a dictionary page from my computer. Simple, yet eye-catching with just a touch of Fall Decor!!

No comments:
Post a Comment
I love hearing comments, questions, and suggestions! Thank you so much for taking the time to share your thoughts!