Pages

Showing posts with label bedroom. Show all posts

Thursday, November 5, 2015

Jack & Jill Bathroom Stripes

Painted stripes on a wall are one of my all time favorite ways to add BIG impact in a room.  


You can do horizontal stripes on the wall in just about any room of the house, including a foyer, bathroom, kids' rooms, playroom, dining room, or living room.  Depending on the room, you can change the paint colors to create the look you are going for.  And it goes with every design style from sophistated, to modern, fun kids' space.  Just make sure the two colors you choose are contrasting enough to really see a visible stripe. 

I saw this great idea on painting a Jack & Jill bathroom in coordinating horizontal stripes this year at the Indianapolis Home-A-Rama.  I was so excited when I came across this recent project that had the perfect space to recreate a similar look.

So here is the plan...hopefully this makes sense!  :)


The fun part of this plan is that I created a color scheme for 5 different spaces, that all coordinate together into one cohesive space overall.

Each bedroom has their own unique style and paint color -- one painted a minty green almost turquoise color and the other painted a light gray.

Here's the fun part...

We then swapped the same exact paint colors and painted each girls' bathroom the opposite color.

In the middle room, which houses the tub and toilet, horizontal stripes were painted around the entire room in both the paint colors of AT SEA (mint green) and PASSIVE (light gray).

How adorable and fun is that?!?  I love how it turned out.  It just brings the entire space all together!

Here is the Design Plan for each space with the paint colors.

Bedroom #1:
Lighting is from Shades of Light from the Young House Love Collection.  
Curtains are from Target.  

Bedroom #2:
Lighting is from Shades of Light from the Young House Love collection. 
Curtains are from Target. 

Each girl has their own space where their bathroom vanity is.  Then they share a room for the shower and toilet.  I think it would be even more adorable if they add in a third color into the design plan -- maybe a coral as an accent color.  Coral looks so pretty with both gray and mint green.

Bath towels all from Target.  Shower Curtain from World Market. 

Now, I didn't just pull these paint colors together overnight.  It took some planning, as any color selection should prior to painting.  

I LOVE choosing paint colors for clients!  It has kind of become my thing recently! But mint green can definitely be a challenging paint color to select.  A mint green paint color can lean too blue, too green, or even too bright!  There is nothing worse for me, than when you choose a paint color and it is WAY brighter and more bold than you thought!  It is always a real bummer!  (One day I will do a post on all of my favorite paint colors, and all of those pait colors to stay away from!  One day!) 

So, I headed to Pinterest and searched for the perfect mint green paint color.  I loved this shade of mint green I found from The Handmade Home website.   It was exactly what I was looking for, but you can never be sure of a color just by looking at a picture online because it can look so different in person.  The color she used is Benjamin Moore.  I typically use Sherwin Williams paint colors.  So I bought a paint swatch of this color, along with 3 more colors from SW and went to painting some test swatches on the wall.


This is a prime example of how pictures don't always do paint colors justice.  Because in person, these colors looked SO different.  


I painted the 4 colors in the room that will be painted this color, on the wall with the most direct sunlight.  I painted.  Let them all dry.  Painted a second coat.  Let them dry.  Then stared at them in different positions of the room until I could make a decision.  Originally, I planned on going with the far right color, until I saw it on the wall.  It was way too bright for my liking.  So, I decided to go with the color I found on Pinterest from Benjamin Moore called At Sea.  


Here is Bedroom #1 Before...


And the paint colors After...


So in love with this fun light for a kids bedroom!  It doesn't give off a ton of light because it is only one bulb, but it sure does look good!  The Large Wire Globe Lantern comes in lots of different colors, I chose Dark Teal, and it is under $99! 

Bedroom #2 Before...


And Bedroom #2 After painting...
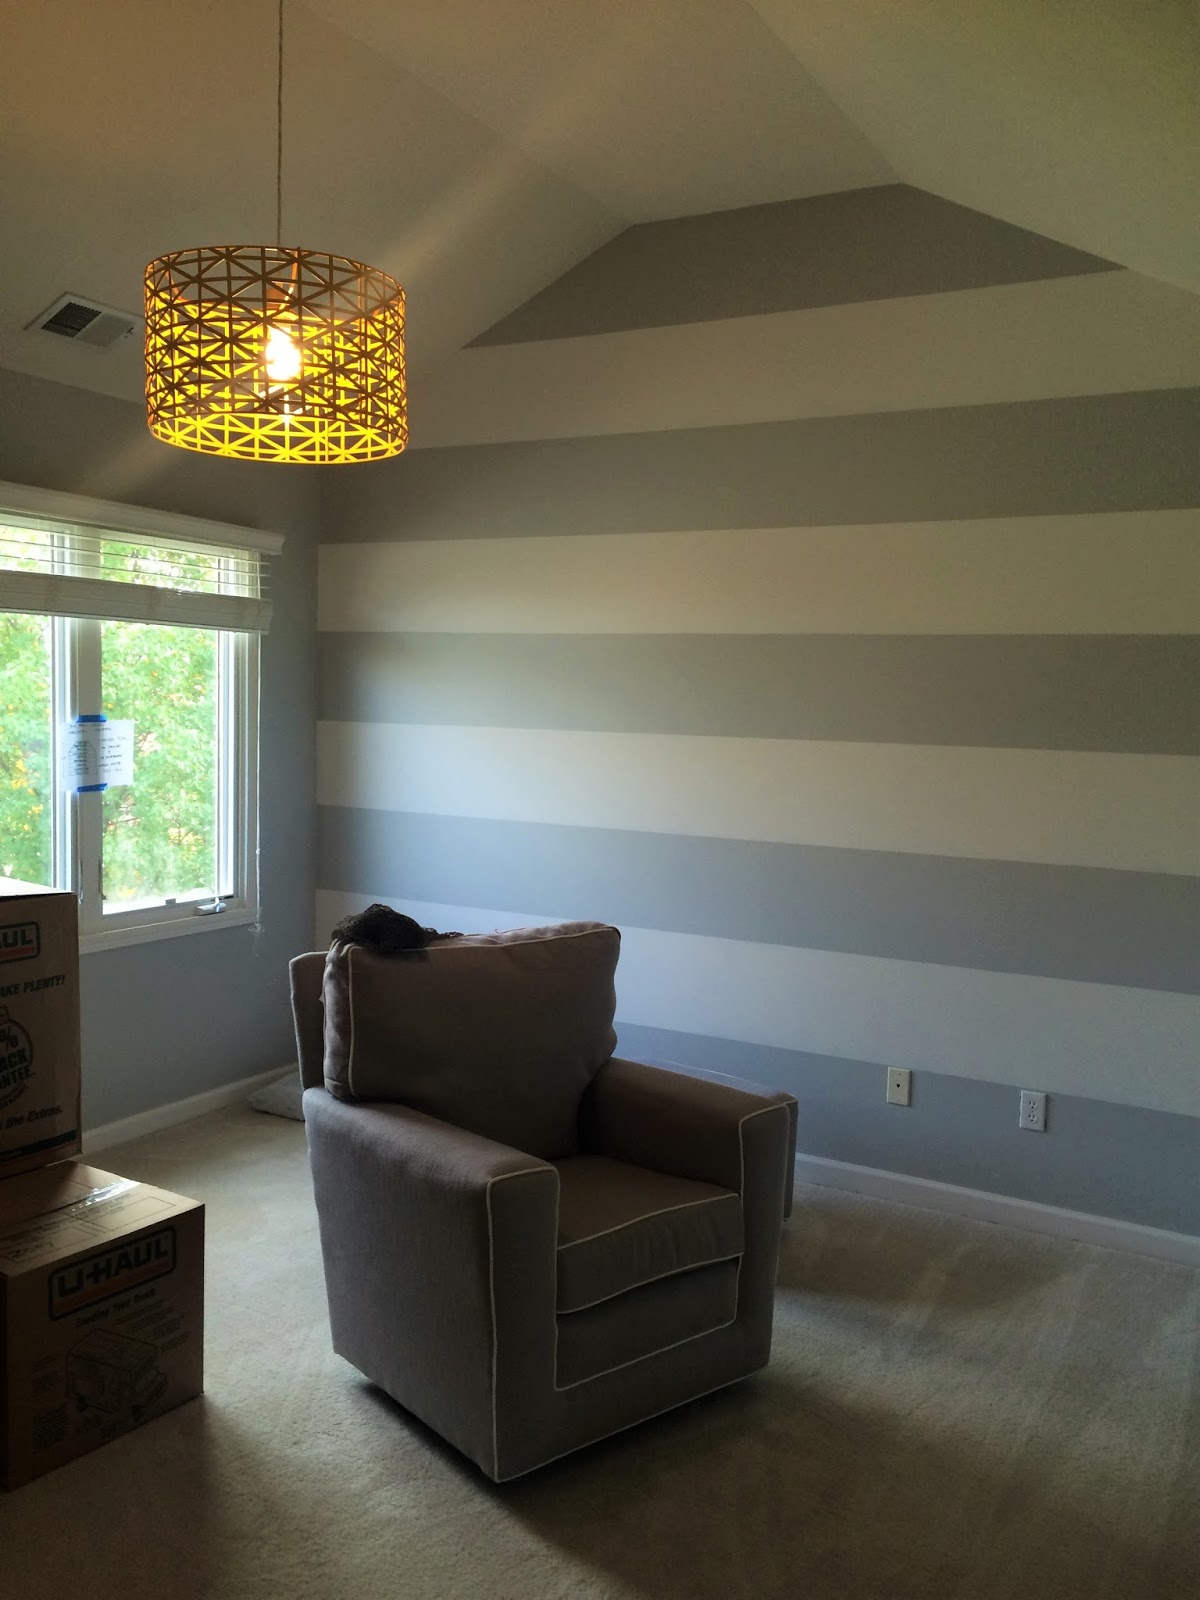

(homeowners just moved in, hence the lack of furniture and boxes)


The Love Metal Strap Drum Pendant, also from Young House Love on Shades of Light website. also comes in lots of color choices and is under $99.  I chose the cheery yellow color called Hello Sunshine. 

Here is the bathroom area painted with the horizontal stripes in Sherwin Williams Passive 7064 and Benjamin Moore At Sea 666.


The key to this really working, is that the homeowner was on board with one daughters room being a fun, bright color, and the other daughters bedroom being a neutral gray.  This helps keep the stripes looking tasteful and sophisticated versus using two bold colors.  If you try this in your home, choose gray as one color, and any bright, fun color to go with it.


Jack & Jill bathrooms and floor plans similar to this are really popular right now.  So maybe you can use this same technique for your space.  It definitely helps that the kids sharing the space are both girls because I could use fun girlypaint colors.  But you could definitely pull this off with a girl and boy.  Even if you just painted each of their 'vanity' areas coordinating colors and then mix the two colors in the middle -- try navy and gray or kelly green and gray.  


Thursday, May 28, 2015

Navy & Green Room to Grow {After}


A few months ago, a mom from Georgia contacted me to help her design her growing son's bedroom.  She was looking to redecorate his "little boy" space into a room he could grow into and enjoy until he was in high school.  E-Design's are perfect for projects like this, where the client feels capable of doing the shopping and decorating themselves, they just have a hard time knowing where to start and how to coordinate all of the new furnishings to create a beautiful bedroom.  Check out the original blog post here to see how we started the project with Mood Boards and a furniture layout.  


Out of the three options I gave them, this is the floor plan I suggested, which was different than the space's original layout.  Sometimes it is nice to move the furniture around to create a different feel to the space you are trying to change.

BEFORE

This is how the bed was placed in the corner, BEFORE.

AFTER

And this is what the bed now looks like with the new furniture layout I suggested.  Taking that bed out of the corner and placing the headboard against that wall creates a more grown up bedroom space for this guy.

BEFORE
 This is the "desk" area BEFORE.  It was really just wasted space.  There were a couple of "kiddish" book shelves that weren't helping with the new grown-up space, so those had to go.  We brought in this industrial style book shelf for books, toys, and trophies for a more grown-up, manly look.

AFTER
The biggest improvement of this little niche was creating a work space for homework and actually utilizing this area.

BEFORE

AFTER

This boy now has some fun art that will grow with him through the years, but since he is still only 10, it also fits with his age now.  Those awesome wire baskets are great for books and keeping the space organized.

BEFORE

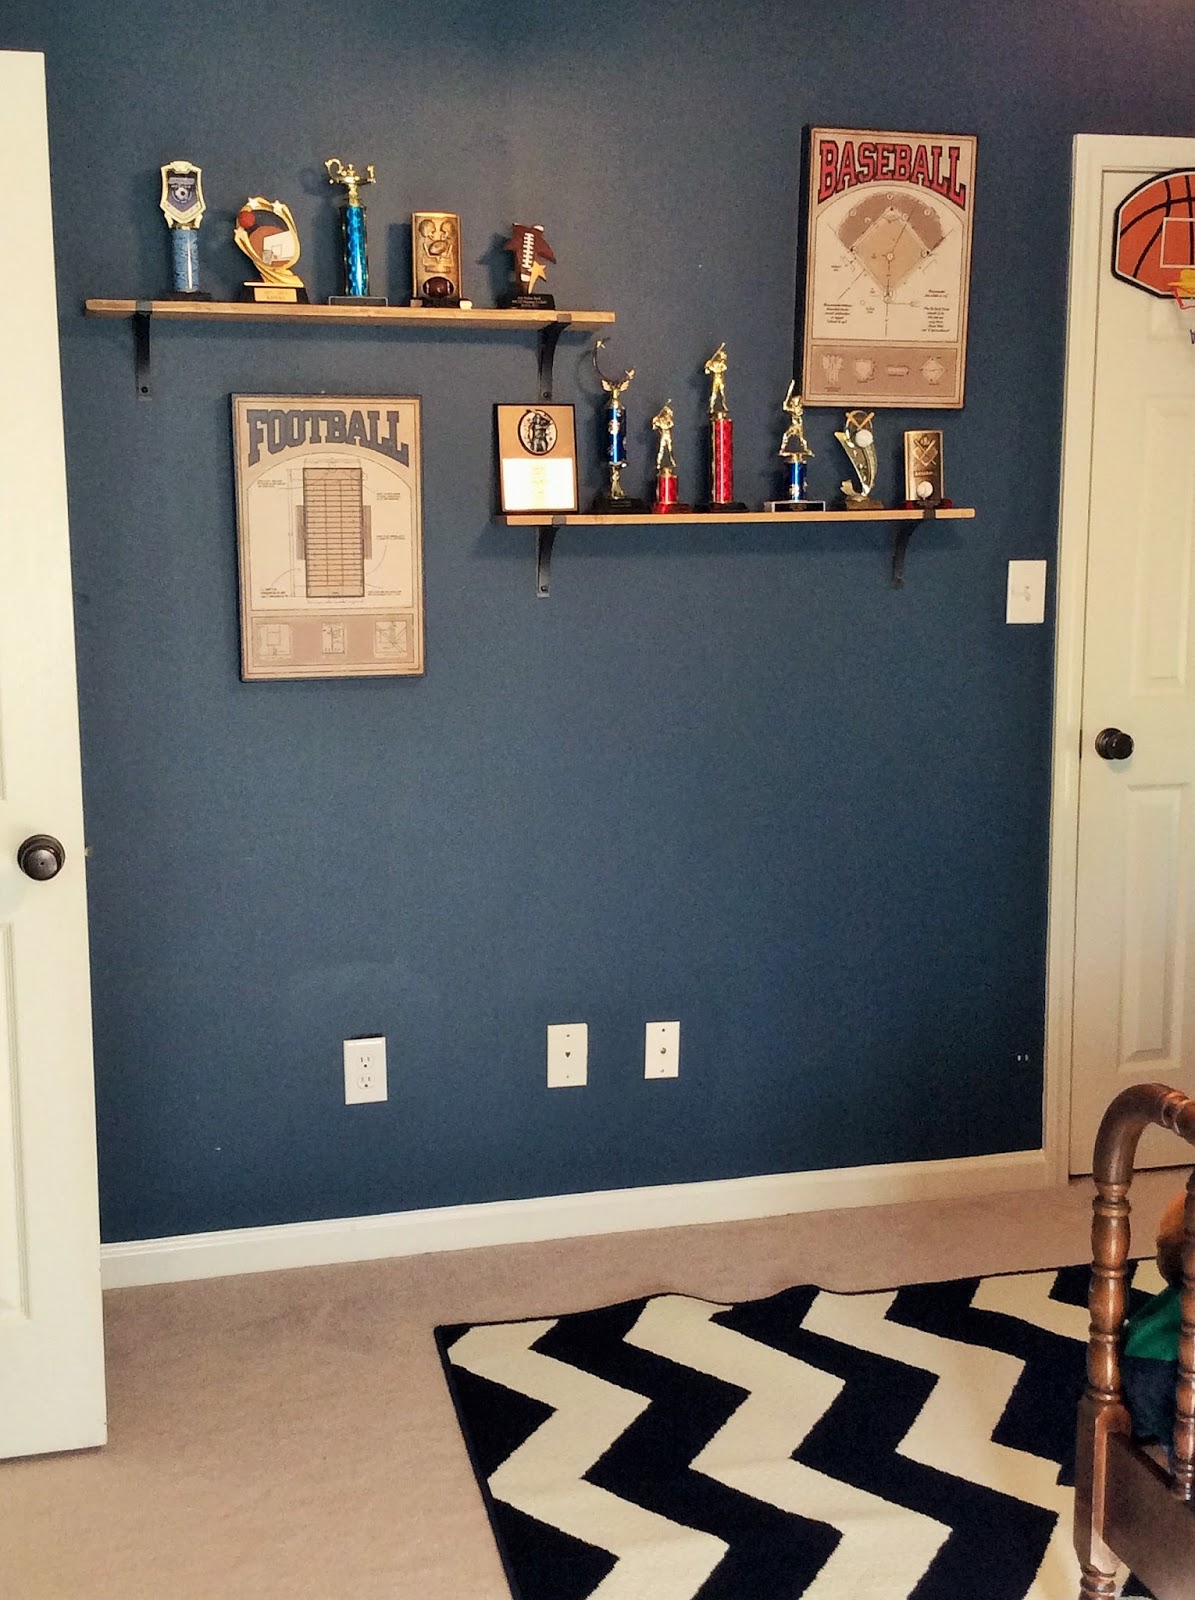
Before, his dresser was covered with trophies and all those little things kids seem to have.  So I wanted to create a space for his trophies that made them feel more special and important.


I suggested floating shelves for this wall because it gives those trophies more importance by having their own area.  And it is a great way to display special items and artwork.

BEFORE
AFTER
Even though there are a few items that are slightly different than what I chose for them, I love how they incorporated all of my ideas and ran with it.  They really created a great space once I led them to the key pieces needed to bring this space together.  It didn't take a lot to create such a huge impact for a growing little boy's bedroom.


The great thing about E-Design is that they are open to interpretation.  So you don't have to furnish the room exactly like I am suggesting, but they are merely suggestions.  You can finish the room as you feel fit for the space and for your budget.  Most of the time, I will always add in a few ideas you didn't ask for, such as an additional night stand in this case, so that you can always add to the space in the future if you want.

And it is always so sweet and humbling to hear such fantastic feedback from a client I have never even met!  She has no idea how much these sweet words mean to me.

"I cannot recommend Jessica's E-design service enough.  I have been following her blog for about a year now and I love her taste and work.  I was very excited when I saw that she offered online design services.  It only took a few emails and pictures to convey what I was looking for and Jessica blew me away with what she came up with.  She provided a detailed source list using vendors I had said that I would prefer to use.  I was able to pull the room together on my own very quickly and efficiently right at what I wanted to spend.  I never would have been able to turn this room into what I wanted without her services.  I look forward to working with her again very soon."   --Beth, from Georgia

And that, my friends, is why I love what I do, and why my job is SO rewarding to me!  Contact me today if you are looking for help with any of your spaces or interested in an E-design.


Monday, March 30, 2015

Navy & Green Room to Grow {E-Design}

What's all the BUZZ about these E-Designs?!?!?

I have talked about an E-Design on here before and I have received a lot of interest and a lot of really great feedback on them.  You can see all the details of an E-Design under my DESIGN SERVICES page here.

E-Designs are great for anyone that is able and willing to do the shopping of the items them self and aren't afraid of a little DIY.  This can be someone in the Indianapolis, IN area or located anywhere in the United States, as we work solely through email.  With so much interest, but also so many questions (is this for me? can I do this?) about my E-Designs, I decided to walk you through and show you EXACTLY what you are getting with E-Design services.

How It Works:

Once we make contact, and you decide an E-Design is right for you, I will have you fill out an online Design Questionnaire that I will email you.  This will help me get to know you, your lifestyle, and the space you are wanting help decorating.  From there, you will send me basic dimensions of the space and photos of the space.  Once I look through these items, I will determine your price, per room, according to the amount of work needed and the size of the space.

Example E-Design:

This little guy, who lives in Georgia, is 10 but basically I am designing a room for a teenager.  Mom was looking for a space that this guy will love now, and will still love in 8 years.  Which is kind of a tall order, but I know I can make it work.  So, with that said, I am designing a space for a teenager, not a 10 year old, knowing he will grow into it.

The #1 rule when decorating a kid's space --

Don't decorate for their age now, decorate for years to come and let them grow into the space.

That way, you don't feel like you have to re-decorate and change their space every couple of years.  


After working with Mom through email, we determined what the space needs, what had to stay (wall color, bed and dresser) and what she was open to changing or adding.

She ordered a few new things already from PB Teen that needed to be worked into the space.  So, I gave her some duvet cover options that worked with what she just purchased.


A quick sketch I put together of the space that I emailed back to the client to determine that all of the dimensions and layout of the space were correct before moving forward.


Before pictures are very important!  It is really challenging to design a space without seeing photos of what I am working with.  And I may see something you need that you didn't see -- I could see this little boy needed some extra storage for books!


The before pictures don't have to be perfect.  The best way to take pictures of a space is to stand in the corner and photograph the opposite corner, trying to get as much as possible in the photo.  And then walk around the space and do that in each corner.


From there, I was able to create a design for the family that they will hopefully love and easily create themselves. 


Anything that needs to be hung in a particular way will include a diagram.

I also provided options for furniture layout.


That's it!  It is really simple for anyone to receive E-Design services from Jessica Stout Design.  Once the design is completed and sent out, you have a few basic revisions I will include but can always add to the design or change anything for an additional fee.

I also provided this client a list of materials, so she could easily and quickly order every single item I proposed online. (this is not the full list of materials!) 


Once this room is completed, I hope to share the after photos.  Here is another recent E-Design before + after I shared for a local client.

contact me at jessicastoutdesign@gmail.com if you think an E-Design is right for you! 


Related Posts Plugin for WordPress, Blogger...