

Seeing the glow from the lights on my Christmas Tree for the first time is one of my favorite parts of Christmas! Nothing says Christmas more than a beautifully lit tree!
Tree decorating is pretty straight forward, real or artificial, it's about the same. I have always had an artificial tree. I grew up with artificial, so I guess that is what I am used to. The idea of picking out my own real tree sounds appealing maybe in the future when I have kids to start new family traditions. I actually used to work at a Christmas tree farm so, I have nothing against real trees. But for now, I will stick with my pre-lit artificial tree! Just add some lights, some ribbon, maybe a tree topper, a tree skirt, and some ornaments, I like a mix of handmade, old and new ornaments, and you have a well trimmed tree for the holidays!
Here are a few extra TIPS to get you started!

Give your tree a boost and some extra height with this clever tip! I like to use one of the storage containers I keep all of my tree ornaments in to add some height to my Christmas Tree. It gives it a larger, grander appearance without the extra tree to decorate. My tree is only 5-1/2 feet tall, but with an extra 18 inches or so from the plastic container, I easily add height to fit the scale of the room. The last thing you want is your Christmas tree to look puny!! Added bonus -- you will have more space for all of the packages under the tree! Don't worry, I have a clever way of hiding that ugly box too!


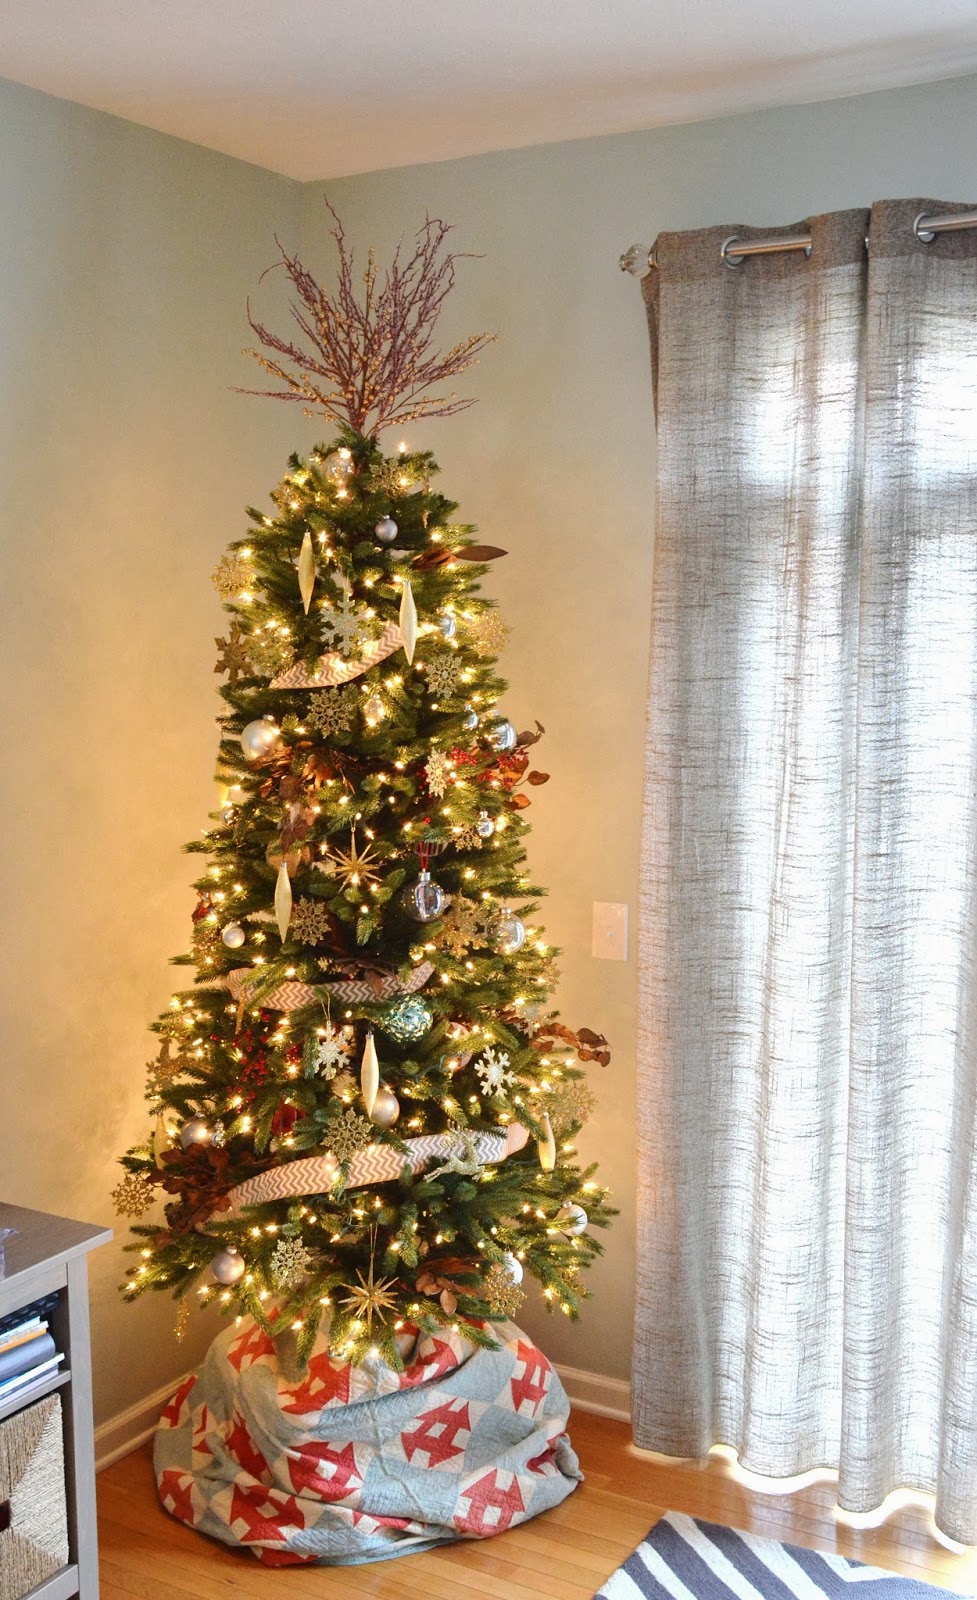
I've never used a typical tree skirt and probably never will. Because I raise my tree up on a box, I use something larger to hide all of the ugliness! To me, Christmas is about family and traditions. And what better way to incorporate family tradition into my Christmas decorating than by using an antique quilt hand-made by my Great Grandmother! The colors are vibrant after all of these years and match my Christmas decor perfectly. It is just the right amount of love to make my tree special! In place of the standard tree skirt you could use anything from a Christmas blanket to a piece of fleece from the fabric store, or even a piece of burlap.


Another non-standard thing I do when decorating my Christmas Tree is I don't go for the classic star tree topper! I love the star as a tree topper but can never seem to find one I like. And I seem to change my Christmas tree color scheme A LOT, so this is much easier! I use a grouping of decorated sticks and berries found at local craft stores, or Hobby Lobby for me, and bunch them together at the top to create a topper! I used 5 of the glassy looking red twigs and about 3 of the gold beaded twigs. You won't need many more than that or it will look out of control like a bad hair day! Less is more! They are easier to manage if you place 3 or 4 in the tree at a time. I use a couple of zip ties to secure the twigs to my Christmas Tree. It's a more modern twist on a traditional classic.


That leads me to Tip #4. Okay, I was only going to do 3 tips for the day, but I feel like I have to
touch base on this last one. It is the biggest, most common mistake
made by people decorating a Christmas tree. Pick a color scheme for your tree and stick with it!

It doesn't have to be the same as the rest of your holiday decor, even though that does look better if it is all cohesive. Because my living room is painted in a soft blue and I have blue and yellow accents throughout, last year I decided I wanted to do a blue color scheme for my tree. It was very pretty with soft blues and silvery tones, but this year, I decided to go more natural, and elegant. So I have included golds, silvers, a little red, and some mercury glass to pull it all together!

A tree with one, maybe two, three, at the most colors, will have the biggest impact and give it a designed appearance. For the biggest impact, use all red, but different shades of red. For a softer, more elegant feel, whites and golds are classic. For a more playful tree, maybe for the kids' room, pick a more playful color palette with pinks or blues.
Lots of different textures will add depth and interest to the tree. I have metallic ornaments. I have shiny and honed gold ornaments. I have glass, sparkly, and handmade paper ornaments. The ribbon I used is burlap. And to really add volume in the tree and to make it look full, I use more of those decorative twigs or berries and stick them throughout the sides of the tree. Anything to make the tree look like a planned out, cohesive look will work. You could even do a snowflake theme and use only snowflake ornaments. The goal is to not mismatch too many colors. That is when the tree will start to look messy and cluttered and in turn takes away from the beauty and essence of the Christmas tree!


This is the time I like to sit back with a hot cup of coffee and a cozy blanket on the couch with my husband and just stare at all the twinkling lights on my Christmas Tree!!
I love that you added a quilt as the tree skirt. My great aunts were wonderful quilt makers and I love to use the quilts whenever I can.
ReplyDeleteNow I'm off to check out the rest of your Christmas decorations! Thanks for the inspiration!
Ashley @ 3littlegreenwoods
Thanks for stopping by and leaving a comment! I hope you enjoyed all of the holiday decorating!
ReplyDelete